Refurbished KEENLAB – KWELD COMPLETE BATTERY SPOT WELDER KIT (CABLES ASSEMBLED)
Out of stock
Brands: Keenlab
Product Code: kWeld – Complete Kit (cables assembled)
$300.00
Out of stock
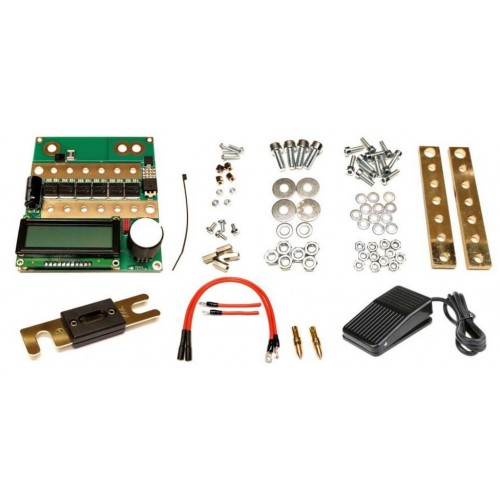
CompareThis item will give you everything needed to build a kWeld unit. Complete the kit using basic tools, add a suitable power source, and start welding. Kit inclusions are listed below . The kit is supplied with cables assembled.
Checkout this independent review and comparison: https://cellsaviors.com/blog/best-spot-welders
The assembly and operating manuals are available on this website for download (https://www.keenlab.de/wp-content/uploads/2018/07/kWeld-assembly-manual-r5.0.pdf – https://www.keenlab.de/wp-content/uploads/2018/07/kWeld-operation-manual-r3.0.pdf). Please make sure to study them carefully in order to ensure safe and reliable operation.
Please note that a power supply is not part of the kit. The following high current power supplies have been tested with the kWeld system and can be recommended:
- Turnigy nano-tech 3S/5000mAh/130C Lithium Polymer battery (link). I have stress tested one of them for several complete discharge cycles, and it shows no visible swell thereafter. The measured current is 1300-1500 amperes.
- Turnigy graphene 3S/6000mAh/65C Lithium Polymer battery (link). These do not show any swell after a few full power discharge cycles, but I have no data on their life span yet. The current level is comparable with the nano-tech model.
- Ultracell UXL65-12 (link). According to feedback from a user, the current reported by kWeld is approx 1000A when tested with 0.15mm nickel strips.
- Bosch SMT 31-100 (link). According to feedback from a user, the welding current reported by kWeld is approx 1400A.
- The power supply must be able to deliver at least 800A (recommended: at least 1000A) to ensure proper functionality of the device.
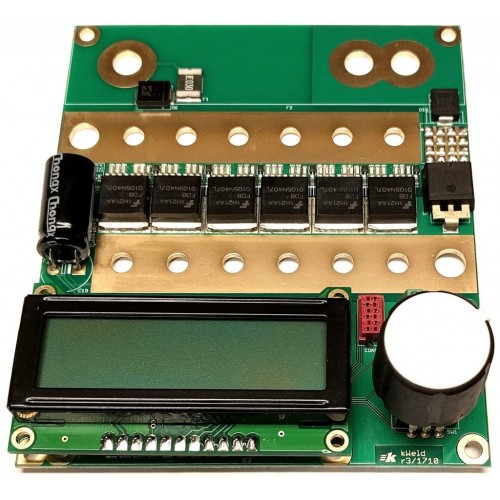
| Electronics | This is the brain of the kWeld battery spot welder. You purchase a professionally reflow soldered, tested and programmed electronic module. See https://www.keenlab.de/index.php/product/kweld-electronics/ for more details. |
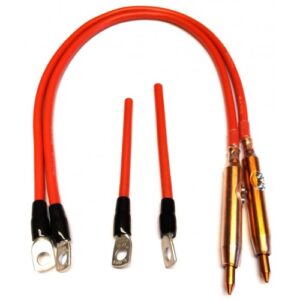
| Cables, electrode holders, and electrodes | All bits and pieces that are required to fully assemble the kWeld cabling, including a pair of electrode holders and a pair of electrodes. (See https://www.keenlab.de/index.php/product/kweld-cable-electrode-holders/ and https://www.keenlab.de/index.php/product/kweld-electrode-set/ for details.) The power input connection consists of loose cable ends, you need to add a connector that matches your power source. Suitable XT150 power connectors are available in the shop.
Choose the supplied loose option if you have the time and tools do do the necessary assembly steps yourself, saving some money. Check out the assembly manual for an overview of the involved work. If you are in doubt, choose the assembled option here. |
| Fuse | A 300A high current fuse (type ANL) that needs to be mounted on the kWeld electronic module and protects the system from the consequences of unlikely catastrophic failures. |
| Foot switch | The pulse trigger switch of the kWeld system. It has a rugged construction, and uses a real micro switch that is also easy to service. The cable length is 2.0m. |
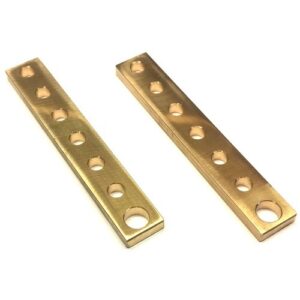
| CNC machined bus bars | These need to be bolted to the electronics module and provide a low impedance path between the switch transistors and the cable system. |
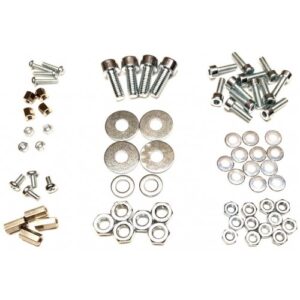
| Mechanical parts | All bits and pieces that are required to fully assemble the kWeld electronics module with the LCD, the cabling, the fuse, and the bus bars. See https://www.keenlab.de/index.php/product/kweld-mechanical-parts/ for more details. |
Tags: kWeld, Spot-Welder, DIY-Welding-kit, DIY-Spot-Welding-Kit, Battery-Spot-Welder.
| Weight | 800 kg |
|---|---|
| Dimensions | 20 × 20 × 15 cm |
| SPECIFICATIONS | |
| Weight | 800g |
| MANUFACTURER’S WARRANTY | |
| Important Note | Lithium Polymer batteries are potentially dangerous. If they fail internally, they can spontaneously self-ignite. It is therefore strongly advised to permanently supervise them during use and also while charging them, and to store them in a fire safe container when not using them. |
| Warning | You are dealing with very high energy levels when using this system, which may result in personal injury or fire when handled improperly. Take appropriate safety measures and use this system with caution. Never leave it unattended while being powered. This product contains small parts, keep out of reach of children! This system produces significant magnet fields, do not use it when you have a cardiac pacemaker! |
| Manufacturer’s Warranty | Disclaimer: This kit is provided as is without any guarantees or warranty, except where obliged by national law. In association with the product, www.keenlab.de and www.hiketech.com.au makes no warranties of any kind, either express or implied, including but not limited to warranties of merchantability, fitness for a particular purpose, of title, or of noninfringement of third party rights. Use of the kit by a user is at the user’s risk. In no event shall www.keenlab.de and/or www.hiketech.com.au be liable for any direct, indirect, punitive, incidental, special, or consequential damages whatsoever arising out of or connected with the use or misuse of any product purchased herein. You agree and acknowledge that any product purchased should be used at your own risk and you should assess the risks before purchasing any product or using any product. You agree that in the event that www.keenlab.de and/or www.hiketech.com.au is deemed liable for any harm caused, the amount which it shall be liable to you shall be limited to the cost of the product. NO REPRESENTATIONS OR WARRANTIES, EITHER EXPRESS OR IMPLIED, OF MERCHANTABILITY, FITNESS FOR A SPECIFIC PURPOSE, THE PRODUCTS TO WHICH THE INFORMATION MENTIONS MAY BE USED WITHOUT INFRINGING THE INTELLECTUAL PROPERTY RIGHTS OF OTHERS, OR OF ANY OTHER NATURE ARE MADE WITH RESPECT TO INFORMATION OR THE PRODUCT TO WHICH INFORMATION MENTIONS. IN NO CASE SHALL THE INFORMATION BE CONSIDERED A PART OF OUR TERMS AND CONDITIONS OF SALE. |

There are no reviews yet.